Showing posts with label 7 days 7 ways. Show all posts

Wednesday, June 18, 2014

... It's back!!! ... 7 days 7 ways!

In the past 3 years, I've dabbled in a few series and segments on the blog and this one, by far, is the one that I'm asked about the most. I've only attempted it a few times but due to mainly being time poor I haven't made it a permanent feature but while I'm celebrating ... it's back!!

So it's 7 days - 7 ways!! For those who aren't long term readers, I use 1 polish for a full week and try to make the most out of it with various combos and techniques. I originally made this series after being asked by friends on how to make the most out of their small polish collection (and by small, I mean like under 10 polishes small, not small as 1 helmer small!)

I've chosen this time around to use Wisteria by piCture pOlish which is available online worldwide. This is the new "reborn" shade that is currently available. Sadly I don't own the original but if anyone has it in a blogsale I'd love to own both!


So as always, day 1 is just wearing the polish as is! No gimmicks. Just 3 coats of gorgeous plus a top coat. Easy peasy! I think it's a really pretty purple. It's bright and warm enough to chase those winter blues away! I'm already looking forward to wearing this colour every day this week!


So I'll be here tomorrow with another suggestion on how to wear this polish. If you have a suggestion on how you want me to use it, then leave a blog comment or a message on the Shatter me Claire Facebook wall and I'll add it to the list!

Sunday, February 17, 2013

... 7 days 7 ways - Day 7 ... Stamping

Final Day! Hoorah!!! I realise that I already did stamping but I forgot and this turned out so pretty it seemed a shame to waste it.
These designs are from the Konad m59 plate and I flipped the image on the pointer finger using the konad double stamper [I removed the rubber from one side and picked up the image and then transferred that to the remaining rubber side and then straight onto my nail. Ooh tricky! Well not really!]
And after 7 days [or really more like 10 days as I was showing these off for a few days before I started the series] since I got my gels put on we have come to an end. I have some obvious regrowth but apart from that  the colour is still strong and I have minimal tip wear and only one nail has a chip [my right hand pointer finger that always suffers when I have excess iProduct time!!]. Honestly I'm quite impressed and I can see myself investing in a kit/lamp in the near future as this has really helped with my nail art time and this week I didn't find myself getting frustrated or impatient as everything was so easy.


I hope this helps those considering gels [or even regular polish] some ideas to change a normal gel base to something totally different!

Friday, February 15, 2013

... 7 days 7 ways - Day 5 ... Striping Tape

So Day 5 has rolled around and it's a really quick one today for you. I've done an accent nail using striping tape today and like other nail art that I've struggled with again this was super quick and easy!! If you make a mistake it's one wipe and start again! Easy!!!
It's not perfect but it beats my previous designs of pulling up the base colour!

And how are the gels holding up ... well I have some lifting on my pinky edge from where my nail meets my skin and my pointer finger on my right hand has had some slight chipping after a hard day swiping on the iPhone but apart from that we are holding up really well!

Thursday, February 14, 2013

... 7 days 7 ways - Day 4 ... Layering

So Day 4 has appeared ... and we are still looking great!! Today I'm layering China Glaze Atlantis on top ... holy wowsers Batman! This is my best day to date in this challenge.
I'm loving this so much! Pretty pretty pretty!!
Just worked out the be the perfect colour combo and the sparkle holo just makes it all the better! 
Day 5 tomorrow ... hopefully we can pull something fantastic out the bag as these nails don't seem to stop giving!!

Wednesday, February 13, 2013

... 7 days 7 ways - Day 3 ... Stamping

And my thorough test of these Luminail gels continues! Day 3 and today I'm rocking some fantastic stamping! There are still no chips on the mani and they are still looking great!
This is Gosh Holo stamped with the Pueen 05 plate. Again it's super easy if you make a boo-boo! Wipe and redo without having to retouch your base! Fantastic!!
Ooooooh ... holo goodness!! Phoar!!! Really simple but I'm loving how it came out.   I'm looking forward to seeing what I can pull out for tomorrow for a new look!

Tuesday, February 12, 2013

... 7 days 7 ways - Day 2 ... Watermarbling

Hi ... my name is Sarah Claire and I'm the chick who cannot watermarble to save herself!!! Or so I thought!
OMG!! Why didn't anyone tell me about using gels for a base before??? This was SO easy!! If I made a mistake then one wipe with non-acetone remover took care of that for me and I could instantly try again!


I used Essie Aruba Blue, piCture pOlish Mellow Yellow and Ulta3 Plum Violet in this mani, over the blue gels I mentioned in my last post.
So if you are someone who is unable to get the watermarble working then you seriously need to try this out. Redoing fingers was so easy! No waiting for a base coat to redry and then getting frustrated when you stuff it up for the billionth time and repeating the process. This took under 5 minutes even with redoing fingers and honestly this is the way I'll be watermarbling in the future.

If you want to be picky I had a few water bubbles but apart from that ... awesome!!

Monday, February 11, 2013

... Aussie Nail Monday - Food ... [or 7 days 7 ways - day 1]

So it's Monday again!! Todays theme is food!!  Mmmmmmmm food!!!

Here's my take on smarties! Mmmmm. Cheating????
How about M&Ms???
Oh ok  ... here's a cupcake! [Made using Essie Jamaica Me Crazy and Aruba Blue and using this tutorial]

Obviously I'm looking rather blue today and I'll explain why. One of the most common blog questions I'm asked is about the "7 days in 7 ways" series that I've done in the past and wanting to know if I'd attempt it again. My most popular posts are from these series so I really wanted to give it another bash.

Over the weekend my wonderful and beautiful friend Margie kindly did my nails [aren't they pretty!!] with gels. I've been asked about gels a lot in recent months and I really wanted to try just so I had my own formed opinion on them. While I've had gels and acrylics in the past and hated them from the minute they hit my fingers ... this is different. It just feels like polish, super smooth polish!!   These hit my fingers Friday night and they are still looking pretty damn awesome.

This colour is Bermuda Blue and it's from the Luminail range. It's a very beautiful sparkly jelly. Loving it! So we'll see how we go trying to pull 7 different combos out of one base! Wish me luck!!!

Before you go ... check out some other Aussie Nails with a food theme!!

Wednesday, July 25, 2012

... 7 days 7 ways - Day 3 Stamping ...

Day 3 already? Wow!

Today I wanted to do some stamping but I really struggled to find a design that would work well with lime green until I saw this.
[Image provided by Google Images from http://plantsvszombies.wikia.com]

I've rediscovered my love for the game Plants vs Zombies lately. My youngest is ill and there is only so much daytime TV you can handle without going inside.
This design is from the Fun 1 stamping plate that is available from Fab Ur Nails. There are so many fun designs on this plate. It's well worth the money! The black is just NYC Color in Night.
I kinda ruined it by not waiting for the stamping to dry before I put on a top coat but I'm still pretty happy with how it turned out!

Now ... back to those zombies!!

Tuesday, July 24, 2012

... 7 days 7 ways - Day 2 Gradient

Incase you missed yesterdays post I'm going for 7 days wearing Rimmel 60 second - 460 Limealicious.

I'm just going for a quick gradient look today. I'm going to use another Rimmel from the I love Lasting Finish range called 238 Forest. Sadly Forest is discontinued *sobs* but you can still find it from time to time in clearance bins if you have a good eye. Anyway it's a beautiful "Forest" Green with a secret green shimmer that appears when you look closely. Love!!

This is also a quick and easy way to fix a manicure if you have tip wear appearing! Also there is no right or wrong way in regards to gradients. Some people like clean lines, others like random areas - it's totally up to you.
This look is really easy to create and there are a lot of tutorials out there on how to do it so I won't go into it. Personally I just use makeup sponges [you can buy a cheap bag of them for like $2] and just tear them into smaller pieces. Practice makes all the difference with gradients and my top tip is patience. Wait for each layer to dry [or stick a quick dry top coat on] before sponging some more colour on. To smooth it all out after use a top coat.

See you tomorrow for Day 3!

Monday, July 23, 2012

... 7 days 7 ways - Revisited ...

7 days 7 ways
Rimmel 60 Seconds - 460 Limealicious
Purchased from Priceline - $6.36 AUD

I tried this series a few months back and had a lot of comments so it's back!! 7 days 7 ways! The idea is really simple. I'm wearing 1 polish every day this week but showing 7 different ways to show it off.

I've chosen Rimmel 460 Limealicious from the 60 seconds range. I picked this as it's seriously a unique colour and as with all the 60 second range it's super fast drying. I also picked this as Rimmel is an easy to get hold of brand in Australia


So Day 1 is just showcasing this beautiful polish by itself. I've used 3 coats in these swatches so you can see how pretty it is by itself. But be warned you will need rather thick runny coats or you will get streaks especially with the big brush that this series comes with.

I'll be back tomorrow with some more ways to wear!

Sunday, February 26, 2012

... 7 days - 7 ways! Day 7 ...

7 days - 7 ways
Free hand zigzags and dots
Coral Colours - Black Sateen

Final day people! I'll round off this series with some free hand nail art. I've just done some black zigzags or as my 5 year old puts it "M's with dots".  Super easy to do with a thin brush, dotting tool or something thin like a toothpick! Just follow the flow! Big thick stripes! Fun! Reminds me of the drizzle on chocolate bars! Mmmmm
I hope you enjoy my little week long series and that it gives you some other ideas on getting the most out of a single colour.  I'll definitely do this again in the future but I'm planning something big for March so stay tuned!!

Saturday, February 25, 2012

... 7 days - 7 ways! Day 6 ...

7 days - 7 ways!
Day 6 - Tips
Coral Colours - Black Sateen
I've been feeling extremely unwell and I'm not good at blogging in advance so you'll have to put up with a simple half assed effort today.

Thought I'd rock some black tips. There are numerous ways you can go for this look from freehand to sticky tape but I've always found the easiest way is with tape you can buy for French Tips. Manicure does a great pack of 20 that only costs $3 that you can buy from places like Priceline and Kmart.

Really easy - paint and add tips. Done!
Hopefully you are still reading! I haven't managed to blog daily for a week in a LONG time! Only one more day to go ... Woohoo!

Friday, February 24, 2012

... 7 days - 7 ways! Day 5 ...

7 days - 7 ways!
Day 5 - Striping Tape
I find using striping tape relaxing to use and the possibilities of designs are basically endless. Striping tape is super thin tape that comes in various colours on these little wheels. They are super cheap to pick up from eBay - like under $2 including postage.

So how to use? All you need to do is paint your nails like normally and then pick your colour of tape and place it sticky side down on your nail - duh! Lastly add a top coat. Easy! Well easy in theory. Obviously I still need a lot of practice but I had fun which is the main thing.

Thursday, February 23, 2012

... 7 days - 7 ways! Day 4 ...

7 days - 7 ways!
Day 4 - Glitter top coat
Mode Cosmetics - Diamante
Hurrah - over half way there and I've still got plenty of ideas to show you. In fact I'm considering having another series or two in the future with more ways to get the most out of your polish.

Today is really simple and it's a glitter top coat. I've chosen to use Mode Cosmetics in Diamante. If you used Diamante on it's on you are sure to be disappointed as it's basically just a clear polish with glitter but if you layer it over an existing polish that's where the fun starts.  I had quick look on Google for swatches for this polish and I think it's been given a rough go as really it's beautiful.

This is 2 coats of Diamante over Bo Peep and I won't lie - this looks WAY better in real life. The glitter reflects red, green and gold in certain light which I struggled to catch on camera - I originally thought it may be a holo but each glitter piece always reflects the same regardless of where you move.  Heads up that you will need a clear top coat if you want it to be smooth as the glitter pieces are slightly bumpy.
Mode is another one of those cheaper brands that live in selected Chemists around the country. RRP is $2.45 which isn't going to break the budget and it's well worth a try

Wednesday, February 22, 2012

... 7 days - 7 ways! Day 3 ...

7 days - 7 ways!
Day 3 - Stripes
Rimmel I  Lasting Finish - 239 Your Majesty
Good ol' stripes! Way to bring something funky to the party.  Firstly - don't be running for the hills just yet ... this idea is seriously easy and is honestly the best way to cover up chips if you can't be bothered to find the polish remover!
** Seriously Simple Steps **
1 - Find 2 contrasting polishes, some scissors and some regular stationery tape [yes the clear stuff!]

2 - If your nails are already painted then skip ahead to step 5!

3 - Paint your nails fully in 1 of the polishes. Do a few coats for good 

4 - Wait for polish to fully dry

5 - When it's dry grab your scissors and sticky tape and cut a few lines off. The thickness is totally up to you.

6 - Place the sticky on your nail where you want it [do not cover up any chips or wear and tear that you want to cover up]

7 - Repeat steps 5 and 6 until you are happy with how your nail is covered

8 - Make sure your tape is fully pressed down on all nails [double check the edges]

9 - Grab your 2nd colour and paint your nails as normal - yes right over the top of the tape

10 - Repeat step 9 if you need a second coat of the top layer

11 - Pull all the sticky tape off [do this sooner rather than later or you run the risk of pulling off the base colour aswell]

12 - Add a top coat so it feels smooth

13 - Sit back and admire your handy work!!

If you didn't get all that and need pictures then click this link to a tutorial by Jane at Nailside - she shows you want I'm trying to explain in pictures rather than just words! [Obviously I've just gone for bold stripes rather than the look she's showing but you get the idea!]

Rimmel polishes are available at Big W, Priceline, Kmart, Target plus many others I'm sure.

Tuesday, February 21, 2012

... 7 days - 7 ways! Day 2 ...

7 days - 7 ways! 
Day 2 - Shattered Look
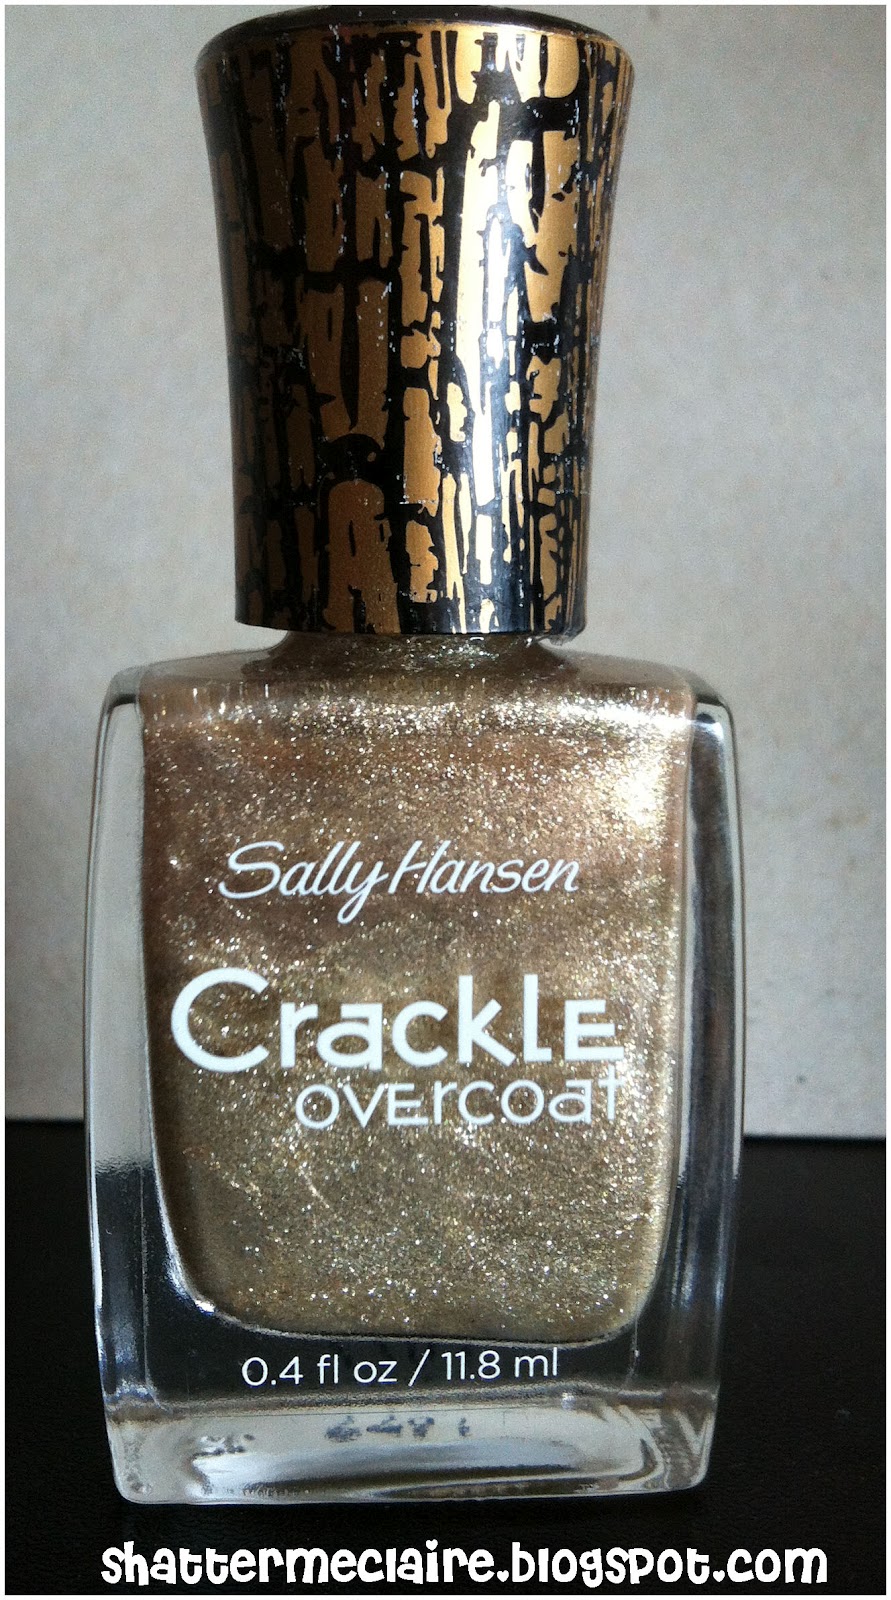
Sally Hansen Crackle Overcoat - Antiqued Gold
Call it what you want ... crackle, mosaic, shatter ... it's all the same. This craze has been and gone overseas but has been hitting the shelves here lately and more people in real life have been asking about this lately so I wanted to include it in this series.  Personally I don't mind the look but there is only so much you can do with it before you become bored.

This is Antiqued Gold which is a bit different than the regular crackles as it's a metallic and brings something a little extra to the party. I personally find with the Sally Hansen range to wait until your polish underneath is completely dry before adding the crackle. In this case it was left overnight before applying. Results will always vary and you'll never get the same result which can be frustrating if you get little to no crackle happening.
I found that the gold worked well with the bright pink and even in the spots where I didn't get a great coat coverage you can still see the pink peeping through. Heads up to try and not get this on your skin when painting as those little metallic glitter particles like to stick around and are a pain to remove even with remover.

I've so far found the range of Sally Hansen Crackle Overcoats at Target and Priceline.

Monday, February 20, 2012

... 7 days - 7 ways! Day 1 ...

Ok I was asked to do this series of posts by someone I know in real life. I often forget that this blog is visited frequently by non-bloggers and I thank my friends for reminding this on occasions. So I am doing this just for you - you know who you are!!

The question I was presented with simply is this ... "I have a seriously small polish collection so how can I manage to keep my nails looking fresh and different without having to resort to purchasing an entire shop of colours"

So I'm going to accept this challenge and show you 1 polish out of my collection and proceed to show 7 different ways to wear it over the next few days and hope that it will give some ideas!  As majority of people who visit "Shatter me Claire" are Aussies I'm showing polish that is easily available here - so advanced apologies to the international visitors to this site.

I've chosen this to be my test subject - Ulta 3 Bo Peep just because this range seems to be a staple in any Aussies polish stash.
Ulta3 is found at various chemists in those huge bins that you need to wade through to find the colour you want. Best thing about Ultra3 polishes is the price! At $2 a pop it's not going to break the bank and you won't cry tears if you end up discarding it in the future or if you decide to only wear it once and it wasn't for you.

Bo Peep is also the same colour known as NYC Magneta which can be found at Woolworths, Big W and Woolies Petrol stores across the country. It's the exact same colour from the same company - just under a different brand name!

Ulta3s are slightly on the smelly side of polish but they are fast drying and there are never any issues with application.
So here is Day 1 and the look is plain and simple ... just polished nails. I'll be back for the next 6 days with the same polish in different ways ... well that's the plan anyway!
Powered By Blogger

Total Pageviews