Showing posts with label fail. Show all posts

Friday, January 25, 2013

... Australia Day Nails - Bogan Flannette Shirt ...

I sat down and thought a lot about what else I could portray for Australia Day ... and I kept coming back to one thing ... Bogans. 

Yes it's true ... Nobody likes a bogan! But I kept thinking of flannelette shirts and while I know they aren't "Aussie" most old style bogans seem to wear one!
I saw this beauty in Big W yesterday and I thought that this would be easy to replicate ... ummm ... yeah right!!!

Stamping ... why do you hate me??? Really!! This one just ended up everywhere ... Plus my top coat bubbled and smudged my stamping *super sad*
Anyway this is Rimmel Double Decker Red stamped with Ulta3 Black Satin using the VL001 plate from Vivid Lacquer.

And I couldn't write a post about bogans without showing my favourite one of all time ... Poida!!
In hindsight ... I think it looks more like the shirt from the Monty Python Lumberjack song!  Better get my thinking cap on for tomorrow!

Wednesday, October 31, 2012

"This is Halloween" Nail Art - FINAL DAY!!!!

Hoorah! I made it to the end! Sure I missed a few days [whoops] but for me I'm quite pleased with myself.

Kinda embarrassed to put this up as it's definitely not what I imagined but you win some, you lose some!  Todays task is to recreate a favourite from the challenge. I chose this manicure from Cathy at More Nail Polish which looked fantastic!! I thought I could pull it off but hey ... can't compete with the master!

Instead of Kleancolor Metallic Orange I used Chemistry 523 [like Ozotic 523] and lets just say I killed it with the black! The blacks I chose weren't up to the task and my stamping sucked!! While it didn't look too bad from a distance, this macro shot does it no favours. Meh!
I'll chalk it up to experience and bring you something great tomorrow for the beginning of a new month!!

Check out some more Halloween blogs here

Friday, October 5, 2012

... "This is Halloween" Nail Art - Watermarbling ...

I'm not exactly sure what watermarbling actually has to do with Halloween ... well apart from making a big Horror Movie of you own trying to make it!!!

I chose to use these 3 colours -  piCture pOlish Violet Femme, ChiChi Walkin On Sunshine and NYC Color Casper.
Now ...  I thought I'd steer away of the obvious Halloween colours and I went with a white base with yellow and purple to try and make some sort of night colours with the moon shining on through.

So after many many many many attempts this is what I came out with. I'm not really happy with it but whatever.
I think it's safe to say that watermarbling and I are still not friends ... but I'm glad I tried [not so glad that I wasted so much polish on this look though]

** Other Challenge Blogs to Check Out **

Wednesday, October 3, 2012

... Fail Nail Art - Angry Birds ...

I wasn't planning to share this but I need to remember that if I don't document the failures I can't see how far I've come in the future!!

So this is continuing on from Essence Fall for Me from yesterday. I thought it made a great sky colour and I have been playing a lot of Angry Birds with the kids over the school holidays so I thought I'd make a point of using my Angry Birds stamp on the FUN1 plate.

So presenting my fail ... little red angry birds and their slingshot!
Obviously there are 2 main flaws ...  the fun bedsheet wrinkles on 2 fingers ... plus the fact that the red is way too dark but I liked the idea behind it. Obviously it didn't look too bad from a distance as I did have a few random compliments on it.
And white doesn't make it any better ... Lesson Learnt!!

Colours used are ...
Red - Illamasqua Aorta
Brown - Nails Inc Basil Street
Light Green - Butter London Dosh
Dark Green - Orly Lucky Duck
Black - Coral Colors Black Sateen
White - Ulta3 Lily White

Thursday, August 2, 2012

... NYC Color - Red Slippers ...

NYC Color - Red Slippers
Available from Woolworths and Big W
Apologies for the lateness of this post. I've been having all sorts of unfun Blogger issues :( Hopefully it'll play nice now and upload my photos and posts!! I will try and make up for it later in the week. I've joined a few Aussies in presenting Australian polishes this week. I haven't forgotten my Rimmel series and I will resume that shortly.
Anyway this is NYC Color in Red Slippers. NYC Color is totally different from the US NYC brand but it is the same as the other Aussie brand Ulta3 [this colour is know as English Rose under the Ulta3 banner]

While it's a beautiful red ... I find it doesn't suit my skin at all which is a shame.

I've used 3 coats in these swatches and it was fast drying and no issues. I know a lot of Aussies overlook the Ulta 3/NYC polishes because of the cheap price but cheap price definitely doesn't mean cheap product. Majority of the colours in the range are really nice.
In order to try and make this colour work for me I tried some stamping on it but failed miserably. I used the beautiful Lilic's plate in A01 but as you can see I stamped half the wrong way and yeah ... massive fail. Whoops!
So there you go. Beautiful colour and I honestly wished we could be more compatible as it's such a pretty red.

Other Aussie blogs I highly suggest you visit for more Great Aussie Polish ....

Michelle from www.labmuffin.com

Saturday, March 31, 2012

... Franken Fail ...

Firstly thanks everyone for following FrankenMarch. I had a ball doing something different and having a series to focus on for the month. Apologies that my health played a part in not posting as regularly as I would have liked but it couldn't be helped. I picked up a lot of new readers and I really hope that you'll stick around.

For those following the Little Roo polishes I still have a few more metallics and other bits that I will showcase here in the next few weeks.

The Franken contest is now CLOSED and I am just double checking the votes and a winner should be announced today or tomorrow depending on how much time I get [I'm supposed to be getting ready for a wedding this minute - not blogging. Whoops]

I'll leave FrankenMarch with a fail ... an interesting fail but a fail. I come up with a lot of interesting concepts in my mind ... but generally putting them into practice turns into different results than I imagined.

Shatters always intrigue me ... partly because of their formula to actually shatter but partly because they are rather unloved in general. My question was this - could you make a holo shatter???

So I decanted a mini bottle of black shatter and got to work. Firstly add some SF ... now I had to use a lot to get the rainbow to appear as all my shatters are a lot thicker than polishes.
[dodgy fail photos to go with the fail polish]

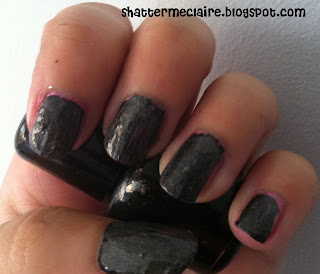
And what happened was a big thick mess. No shatter [well it tried on one finger] but it's just disgusting. I'm embarrassed to even show you the mess. Also being a shatter it was a bitch to remove as it was just everywhere by the time I finished.
Gross .... so gross!
Even the holo couldn't overcome this chunky mess! Yuck!

The only positive I walked away with ... is the fact that this is still a dark black. Every other SF black franken I've tried to make has had a silver tinge to it while this is still definitely black. I may revisit this bottle another day armed with a heap of polish thinner as it does have possibilities but I think the shatter component is definitely long gone.

While this is a good idea in theory unless you have a heap of SF to spare I wouldn't recommend going for it. I wasted heaps on this and while I'm glad to have done it I know I wouldn't dare to it again.

Monday, March 5, 2012

... Little Roo - BushPig ...

What's a series on Frankens without some fails ... so here is one I prepared yesterday for you.

BushPig
 BushPig - an unflattering word to describe a female generally from the country or bush [insert "bushpig" where you would use the word "bitch" or "slut"]
 Type - Franken
Firstly? Is Bushpig still even used? It sounds so 80s but it was the first thing that popped into my head when this creation was born. Still makes me giggle like an immature 13 year old!

I had good intentions with this franken and it mixed well on my palette but in the end it's all my fault that failure occured. Sometimes you need to think ahead and I didn't. So - on with the story.

Basically this is Chemistry 230 mixed with Ulta3 Brandywine.
Chemistry 230 was one of my first Chemistrys I managed to source and I was extremely excited as it looked so pretty in the bottle but sadly it was only some red glitter and holo bars in some clear ... and honestly I've never worn it since and it's sat at the back of my helmer collecting dust.

I thought Brandywine would be a good mix as it's a red with a shimmer and in my mind I really wanted to more create the look of the Chemistry bottle and have it show actually on nails.

Sounded good in theory right. The frankened bottle looks fantastic with the pretty holo pieces mixed in with red shimmer and it looks awesome ... but ... someone didn't make it a 1 coater did they *sad*
So unfortunately you end up with holo pieces under the 2nd coat of red that is required. I'm also not a pro in scooping bar glitter out - it never works for me. I may try it in future on top of a red but at the moment I'm just disappointed with it.

So that's my franken fail for the time being. Unless someone I owe a swap too wants this then it's destined to go back into the spot recently vacated by Chemistry 230 to sit back collecting dust.

Sunday, October 9, 2011

... Franken Week - Beautiful on the Inside ...

Unfortunately I am leaving Franken Week with a failed franken - I was really hoping to have time today to create something fantastic and new but unfortunately I fell on my arm last night and owie :( I'm pretty sure it's not broken but man it hurts - currently it's all puffy [and oddly not bruised], very sore and achy and my fingers keep having pins and needles which totally sucks. What even more sucks is that I did my dominant right hand and I'm now struggling with having to do things with 1 hand [and very much struggling writing this as it's so slow and my fingers just want to touchtype again!!]

This blurry mess is another shatter I created which I've named "Beautiful on the Inside". It's a pretty pale pink and the bottle is actually full of spectraflair ... because I forgot that shatters dry matte. So it's beautiful on the inside of the bottle as it's full of holo goodness but on the nail - meh.  Also the spectraflair made the polish rather thick to apply ... so yeah - don't do it!!!
[For everyones records this is Ozotic White Mosaic mixed with spectraflair and True Coral pigment]

And as I've had a few emailed questions about frankening shatters here are my top tips and I hope they help someone out in the future.

* Start small! It doesn't work like regular frankening - you can't just dump everything into a bottle with this one. It's a lot easier to get the formula right and then slowly add more on top.
* Don't use clear - it doesn't mix together with shatter/crackle polish nicely and you just have a bottle with a layer of clear on the top and the shatter underneath
* If you decide to try to mix with polish - again try in super small form first. You'll know if it's not going to work [I couldn't get any polish to work but hey - maybe someone will have better luck]
* If you use pigments - add them into your bottle first and then slowly add your shatter polish on top. SLOWLY! Mix regularly and test often to see if it actually crackles on your nails - if not you need more shatter added.

Oh and before I go and rest again check out a fun guestpost I did for Manicured Monkey :) CLICK CLICK CLICK

Sunday, July 24, 2011

Blogroll & Giveaway Pages ... plus Water Decal failness

It's a bit of a mixed bag today as I'm still in holiday mode but tomorrow it's back to regularly scheduled fun.

I've spent today tidying up my blog before it gets wildly out of control. So ... blogs and giveaways now have their own little tabs up the tops. Oooh - pretty!

The giveaway page will be updated regularly instead of a weekly post here. Obviously I'll be removing ones that have ended and constantly adding new ones that I come across in my travels across cyberspace. I was at a stage where I would forget to actually enter giveaways I was plugging ... or enter them more than once as I'd forget that I'd entered - Whoops!! I always love seeing a familiar name win these things so get clicking!!

Also if you want to be listed on my blogroll please either comment below or send me an email with the link on the right! Hopefully I haven't missed many of you!

The super lovely Flossy from Flossy Locks sent me these water decals to try out awhile back and I had forgotten about posting the pics until last night.
So they look really pretty ... and comes with a simple 5 steps to get them on your nails. Cut them out - peel the protective layer off - soak in water - place on your nails - add a top coat when dry. Sounds simple but there has to be a real trick to these and making them look good - for the time I took fiddling around with them I probably could have painted my nails properly and done some stamping or nail art.

I managed to get them onto my nails in one piece and thought "this is working really easy" ... but from there it was all downhill. My main issue was that they wouldn't dry - and then when they did they didn't stick to the nail [even with a top coat]. Also I found that the top was easy enough to shape and file the bottom was another story altogether. In the end I ended up damaging one decal design aswell by adding a top coat - whoops!
I have some more of these decals and I would love to actually work out how they are supposed too go. If you have had success I'd love to hear from you - otherwise I'll get youtubing!
Powered By Blogger

Total Pageviews